

Buy and manage seats
This page shows org admins how to purchase editor seats and manage billing. For what a seat is, see How editor seats work.
All billing lives in Settings → the Organization group → Licenses, in the Seats & billing section.
Buy seats for the first time
Section titled “Buy seats for the first time”- Select Add seats.
- Set the seat total and pick a billing term — Annual or Monthly (the annual term shows its savings badge next to the toggle).
- Select Continue to checkout and pay on Stripe’s secure checkout page.
Your seat limit updates as soon as Stripe confirms the payment. Prices shown exclude tax.
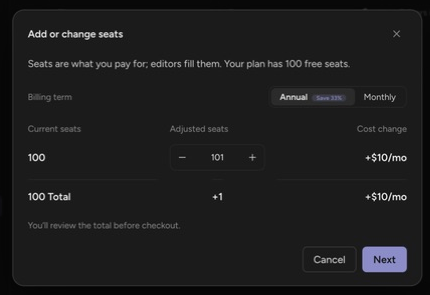
Add seats to an existing plan
Section titled “Add seats to an existing plan”Adding seats later uses the same Add seats dialog. Added seats bill on your existing plan’s term, pro-rated for the current period — you confirm the exact amount due today, then select Confirm & purchase. The charge goes to the card on file, and you can change the payment method from the confirmation step.
Reduce seats
Section titled “Reduce seats”Set a lower total in the same dialog and select Confirm reduction. Removed seats leave your plan immediately; unused time becomes account credit on future invoices — there is no immediate refund or charge.
Reducing requires headroom first: if more editors currently hold seats than the new limit would allow, the dialog tells you how many licenses to revoke before the reduction can go through. Revoke seats in the Licensed editors list, then retry.
Manage payment, term, and invoices
Section titled “Manage payment, term, and invoices”Select Manage billing to open the Stripe Customer Portal. Use it to:
- Update the payment method.
- Switch between annual and monthly terms.
- Download invoices.
- Cancel the subscription.
The Seats & billing section shows your plan, renewal date, seat total, and how many editors are in use.
Up next: Cancel or fix billing.